Step by Step Guide on How to Install WP Minds Growth Theme
There are different ways to install a WordPress Theme on your website, Like: Via theme directory, using the upload method, or FTP. In all of them, the theme directory method is the simplest method.
Here, we have added a detailed guide that will help you to install WP Minds Growth Theme via the theme directory in 5 simple steps. Let’s get started!
Step 1: Download and Extract the Zip File
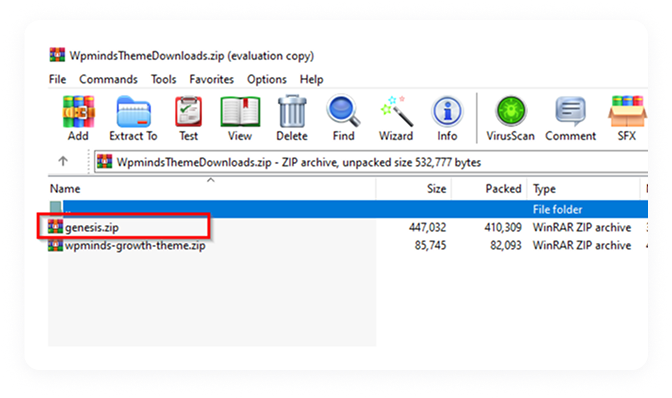
Hopefully, You have already downloaded the theme from here. Extract this Zip file.
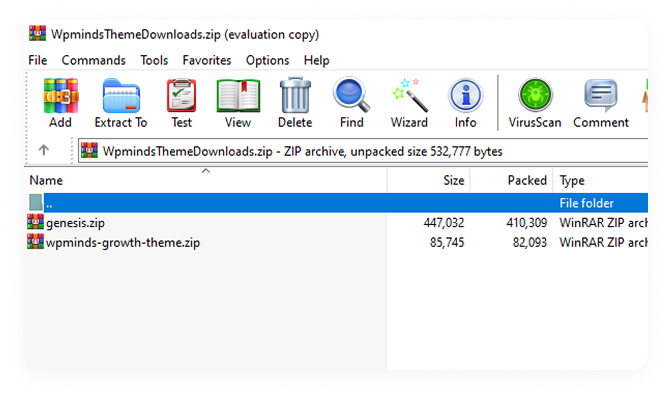
Details about the extracted files:
- “genesis.zip” is a parent Genesis theme
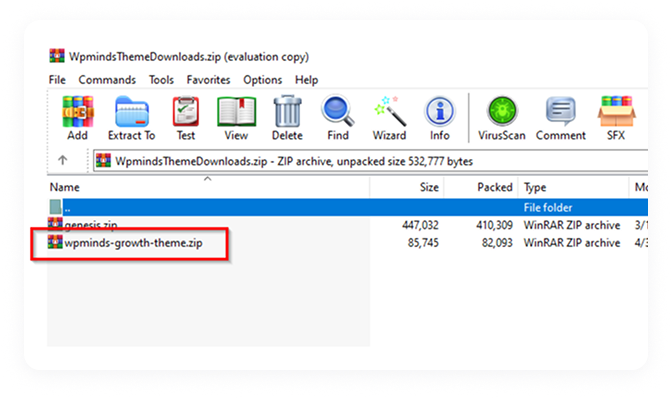
- “wpminds-growth-theme-.zip” is the child theme
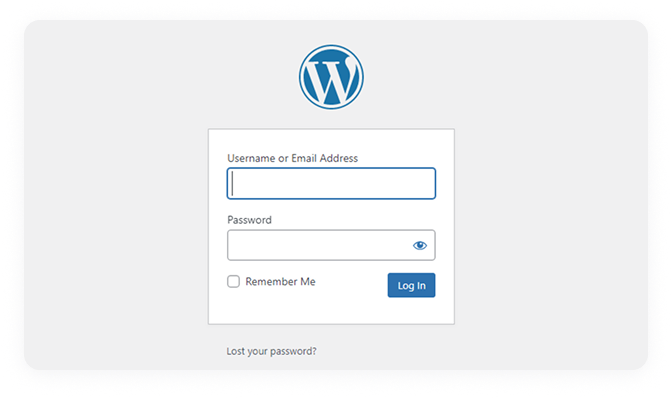
Step 2: Log In to Your WordPress Dashboard
Access your WordPress dashboard to start managing and updating your website.
Navigate to your website admin page
- Enter your credentials
- log in to your WordPress website
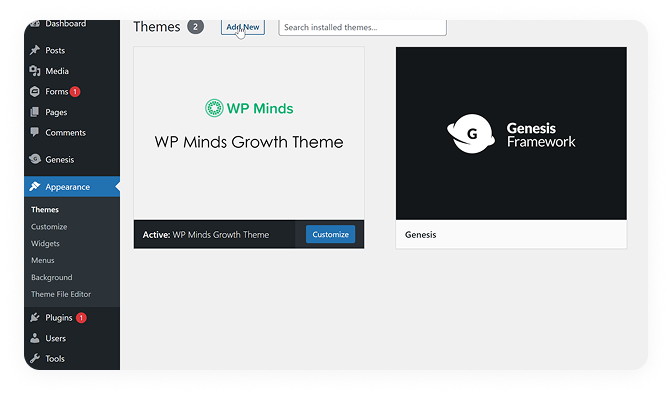
Step 3: Navigate to Appearance > Themes
Go to Appearance > Themes to manage, install, or activate your WordPress theme.
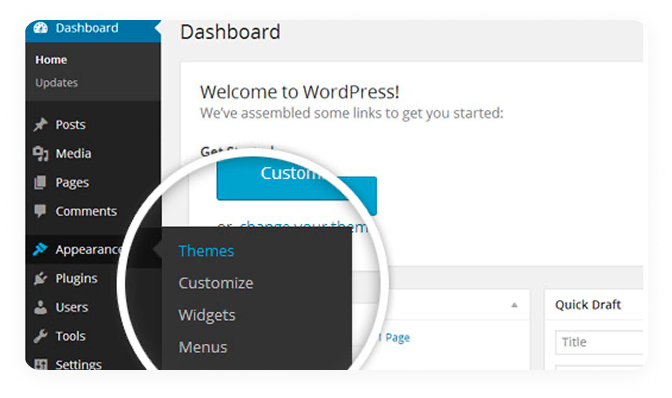
From the menu of your WP Dashboard
- Navigate to Appearance > Themes
- Hover your mouse over Appearance
- Select Themes from the option box.
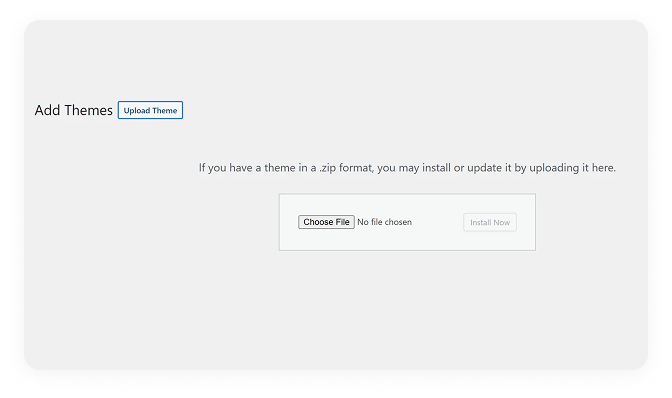
Step 4: Upload Genesis & WP Minds Growth Theme
Upload and install the Genesis Framework and WP Minds Growth Theme to get started.
Click “Add New”
It will open up a dialog box. Select the Choose file button from here.
Add Genesis theme first as the parent theme of your WordPress website. You can find it in the zip folder with “Genesis.Zip” name
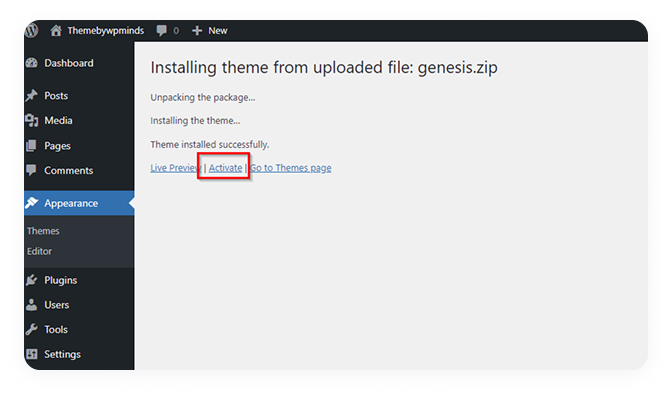
Once you have successfully uploaded the Genesis theme, upload the WP Minds Growth Theme.
Navigate back to Appearance > Themes > Add New
Upload the “Wpminds-Growth-Theme-.Zip” file. You can find it in the zip folder.
Once uploaded, Activate The Theme.
Navigate to WP Dashboard > Genesis > Child Theme Setup
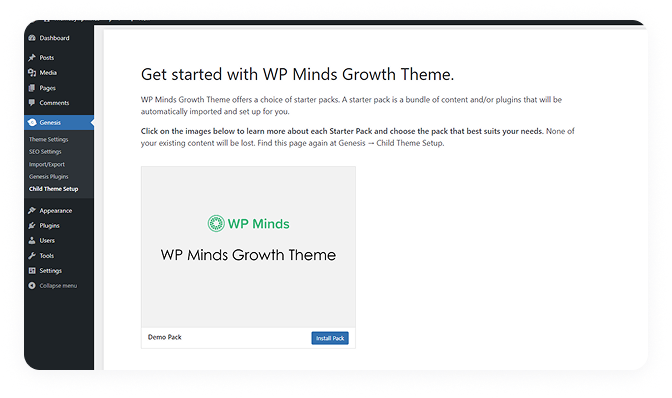
Click “Install Pack” and it will start installing all Recommended plugins and Demo content to your WordPress website.
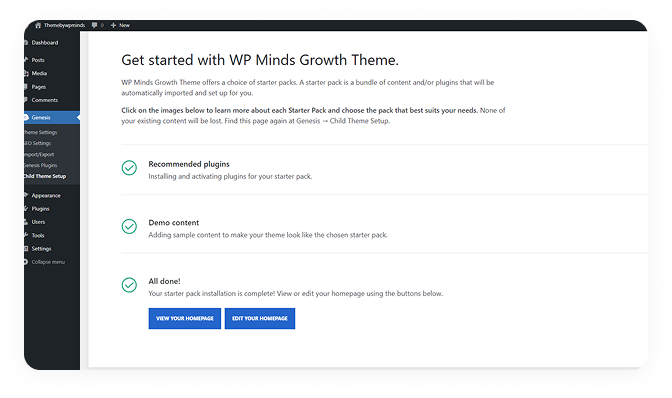
That’s all!
Congratulations, You have successfully installed the WP Minds Growth Theme up and it’s running.
Feel free to contact us if you have any questions or need further help with installing the theme.